Get Your Handspring

A back handspring is the first backward tumbling skill gymnasts learn on the floor. For many gymnasts, it proves to be the first challenging skill to learn, let alone master.
But what is a back handspring? A back handspring begins with a set, with the gymnast pushing upward and backward while rotating in an arched shape to handstand shape, then popping in a hollow shape to the feet.
Why is it so hard?
First, it involves backward tumbling! If you haven’t tumbled backward, you might not realize it’s downright terrifying to tumble the first time without being able to see behind you! Our instinct is to “look” behind us before we tumble, but we can’t do that with a RO-BHS connection.
Second, there are a lot of component shapes that need to be hit to do a back handspring with great form. It takes time, practice, and many repetitions to make it happen. (And then even more repetitions!)
Parts of the Handspring
When teaching how to do a back handspring, we break it down into the component actions.
Set & Jump
Arch & Rainbow
Block & Pop
Hollow and Stand

These are the cues we give to our gymnasts so they can focus on the movements while learning to do a back handspring. Cues are verbal signals that help your body remember an action while you build muscle memory. Good cues are short and describe the action. Cues help gymnasts know when to perform specific actions.
Correct body shapes are very important in a back handspring. Without the correct body shapes, the back handspring will have deductions, or worse yet, fail in its execution. Gymnasts need to be aware of their body shape as soon as they set.
Many coaches are now teaching the BHS without an arm swing since it’s not needed for power. I prefer to teach BHS without the arm swing as I feel it leads to a better connection from a roundoff. Gymnasts don’t need to reach down before going into the BHS and it eliminates the need to pause. But, to each their own, and if you teach the arm swing, adjust those directions accordingly.
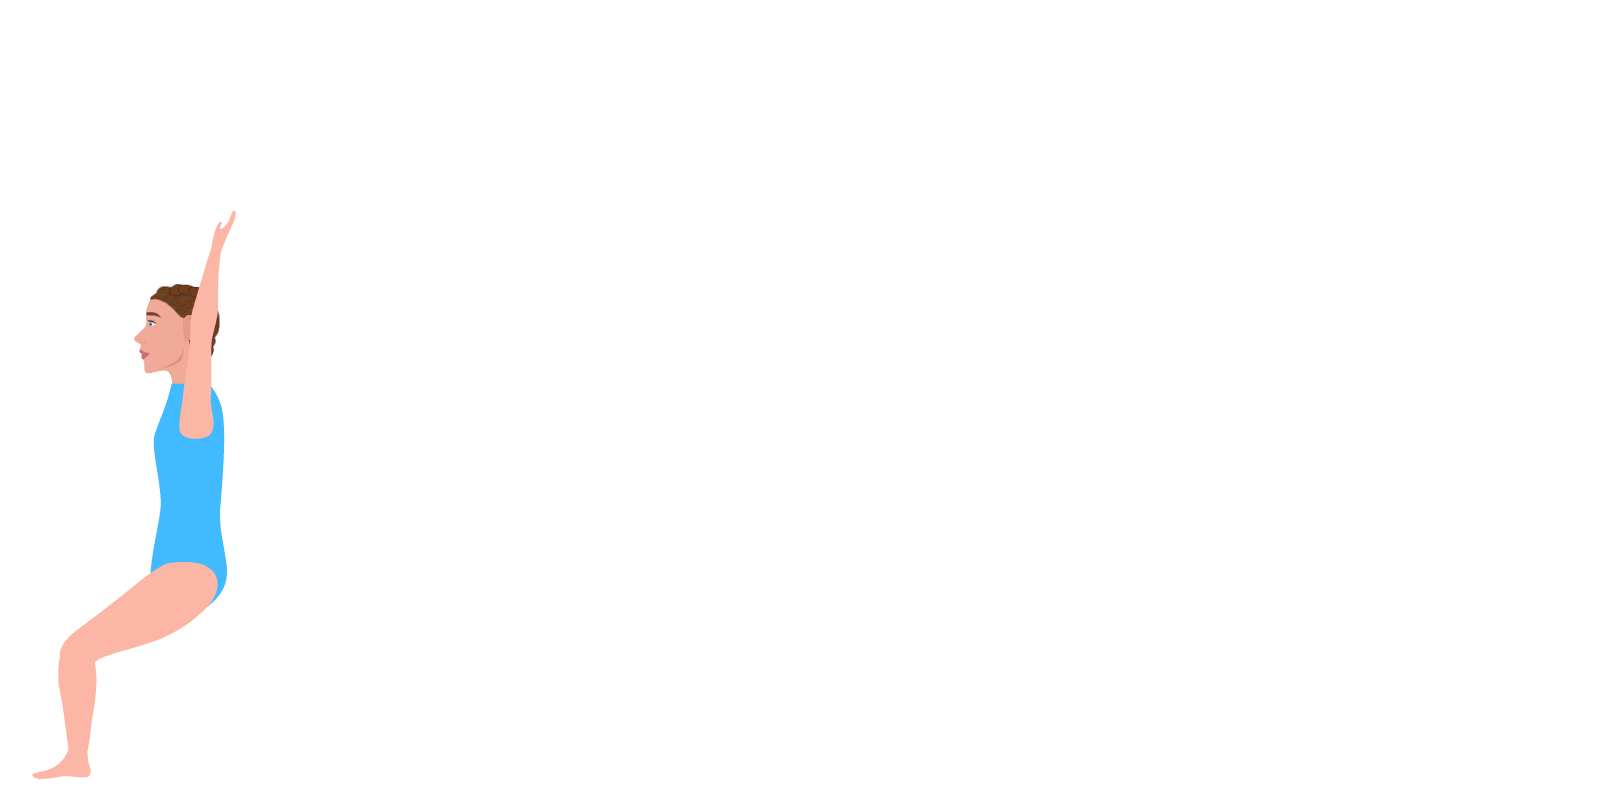
Set & Jump
The Powerhouse of the Handspring
The set and jump provide the power for the back handspring. Without a good set, a back handspring isn’t going far - literally.
So how do you set for a back handspring? You start by compressing the legs by bending the knees. For most people, the ideal bend is between 50º to 100º, although it will take some personal experimentation to determine your most effective set.
Once you’ve compressed (creating potential energy), we’re going to release that energy in the direction we want to go - in this case, upward and backward.
How you jump up will affect where your handspring goes. We want our BHS to be long and straight, so we want our set to lean back when we take off. If we take off going directly up, we’re going to go up - like a flip.
So for a stretched back handspring, we want a set that takes off vertically and backward. To achieve that, the gymnast leans backward as they jump up.
With our young gymnasts, we describe it as sitting in a chair - and pushing it over (by leaning back) as you jump up.
Tips: Set & Jump
Keep your arms tight by your ears
Set deep
Don’t set so deep you lose balance or power
Jump with power, pushing against the floor for maximum power
Continue pushing with your entire foot and leg until you have flight
When jumping up, lean back into the back handspring
Stretch your body back and upward, opening into a stretched but arched position
Shoulders fully open and blocked
Back slightly arched
Core and bum tight
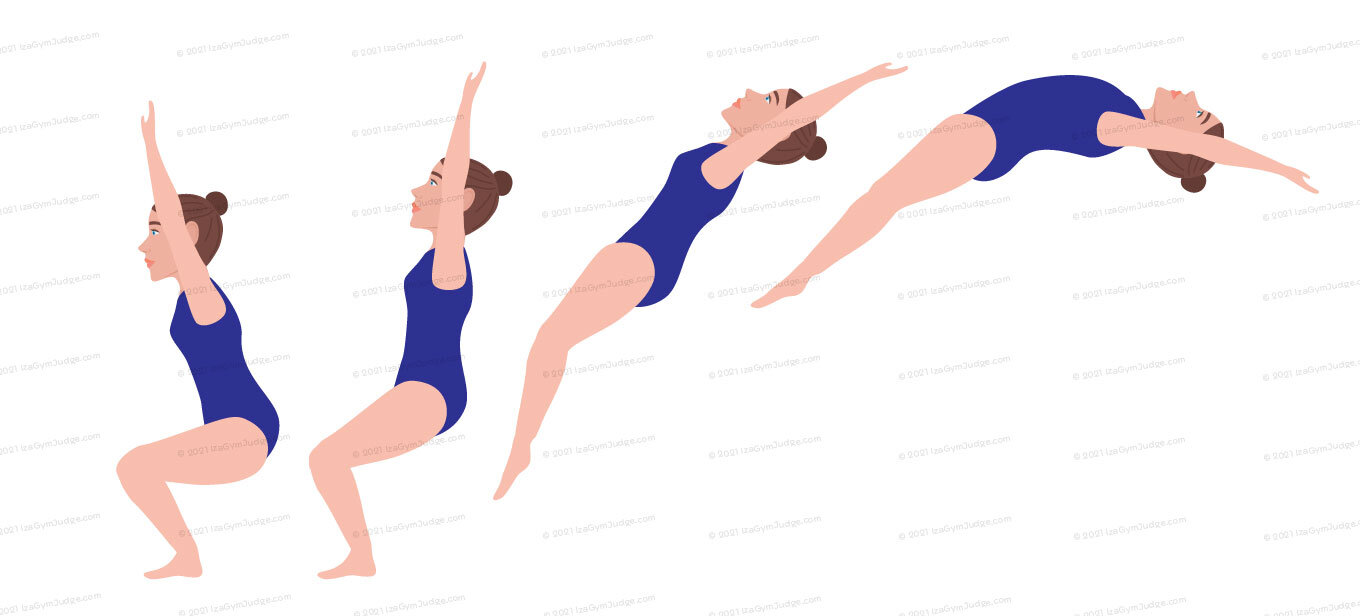
Rainbow Arch
Streamlined Shape
Now that you have the power (and flight) for your back handspring, we need to get into the proper body position to make the most of your power and momentum.
Believe it or not, taking the time to perfect the back handspring shape will pay off later. It’s much harder to fix a bad back handspring than to teach a back handspring with good form. Trust me - ask any gymnastics coach and they’ll agree.
The rainbow or arched shape streamlines the body for maximum speed and dynamics. We want to cleanly slice through the air for the best back handsprings.
To have a good back handspring, gymnasts need enough leg muscle strength to have a good set.
To effectively block off the ground, gymnasts need enough arm and shoulder strength to support themselves after flight.
Without the necessary strength, the gymnast will collapse, or the back handspring will suffer. Later in our Drills for Back Handsprings section, you’ll find conditioning drills you can do at home to improve your strength for a back handspring. Our drills target the muscle groups, muscle actions, and timing your gymnast needs to learn and master the back handspring.
Tips: Rainbow Arch
Keep your arms straight and tight by your ears
As soon as you leave the ground, get tight by actively squeezing
Knees squeezed tightly together with legs straight
Tighten core and bum
Stretch your body backward, opening into a stretched but arched position
Shoulders fully open and blocked
Back slightly arched
Head between arms
Block & Pop
No Shock Absorbers

Now that the gymnast is moving backward and upward from setting into her back handspring, we need to transfer that energy using the block and pop method.
In gymnastics, you’ll hear about blocking over and over again. But what is blocking?
Blocking is a fundamental concept of stiffness that transfers maximum power. In this instance, we need to block with our shoulders to keep the momentum of the skill going. If we go into the handstand shape with bent arms, we’re going to absorb all of that power - just like a shock absorber. We don’t want to absorb the energy - we want to transfer it.
To transfer power, we need to keep our arms straight and our shoulders tight to contact the floor. Our extended shoulders and tight arms block into the floor, and we pop off as our momentum changes direction. We don’t need to bend our arms and push out of the back handspring. We have no choice but to pop back up with proper form as we transfer the energy into the hollow and stand phase.
Gymnasts need shoulder, core, and arm strength to block against the floor. Momentum carries them into the floor while the block changes that direction (at least it’s supposed to) away from the floor. Without enough strength to block, gymnasts will collapse.
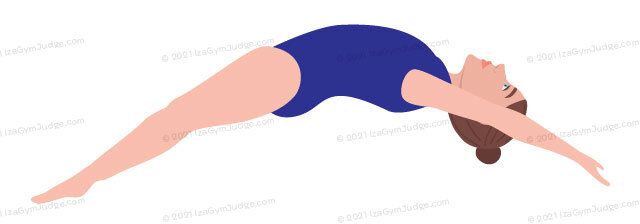
Tips: Block & Pop
Keep your arms straight and tight by your ears
Head between arms
Knees squeezed tightly together with legs straight
Tighten core and bum
Loose arms (not tight/blocked) act like shock absorbers and stop momentum
Extended & squeezed shoulders will block to pop the gymnast
Keep your shoulders squeezed and your shoulder angle open
After you pass through vertical and pop, hollow your chest, keeping a straight body shape
Maintain body tension while you prepare for landing

Back Handspring Drills
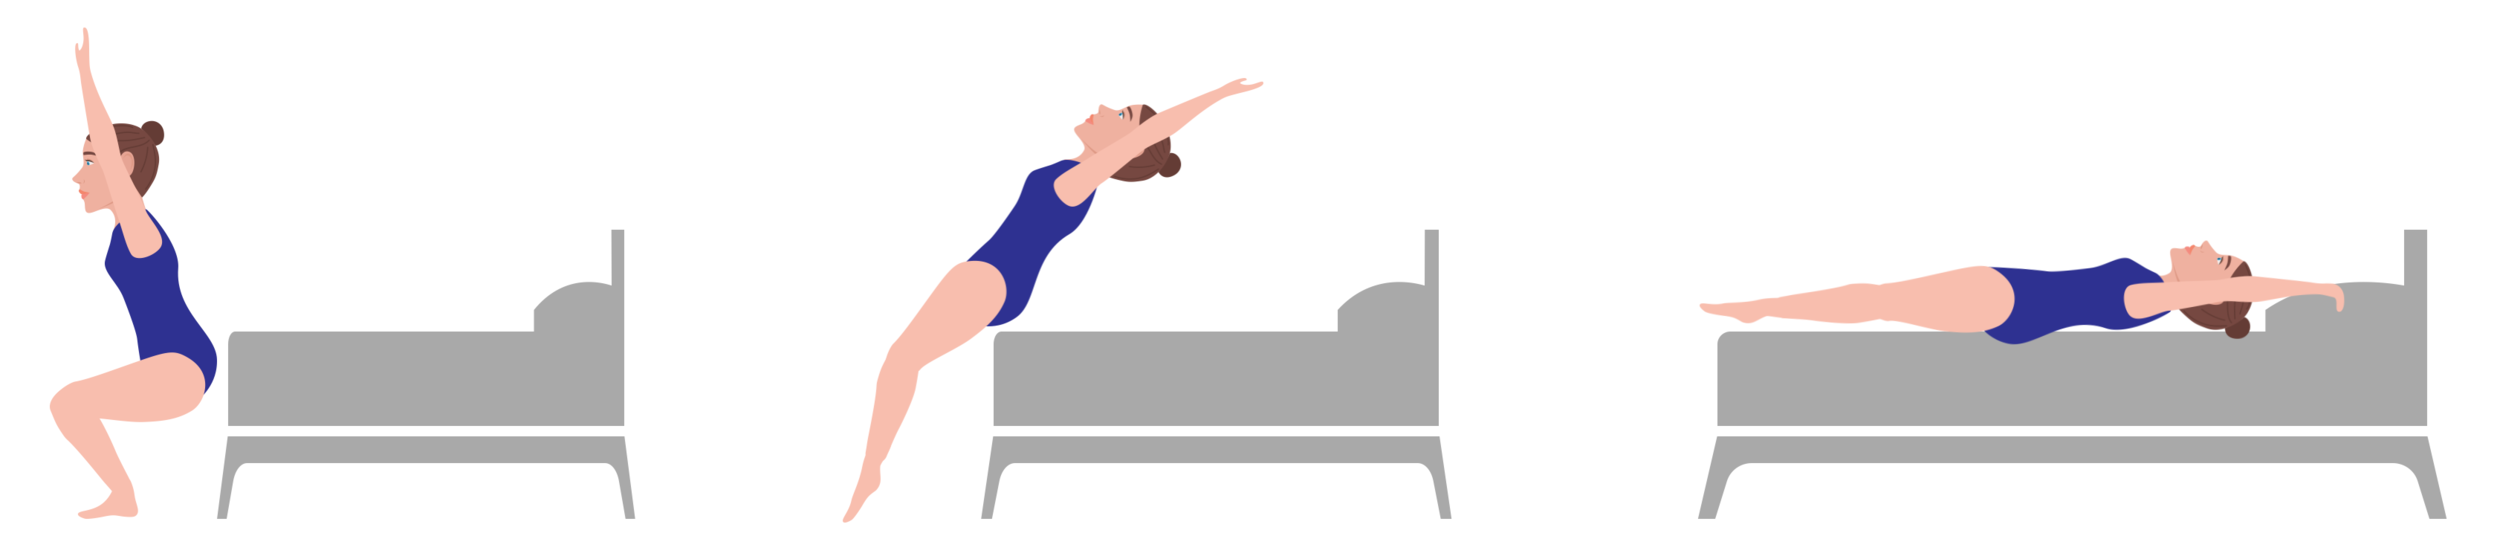
Flat Beds
Ask your parent’s permission for this! Before you begin, be sure there’s nothing on your bed for you to land on, and nothing in the way of you jumping to your back. Start by standing right next to your bed, with your back close to the bed. Gently compress and jump backward to land on your back on the bed mattress. Your feet may hang off the bed - and that’s okay.
Power Jumps
Power jumps begin by holding a soft weight of up to 5% of body weight in your hands. Hold your hands at chest level near your body. Bend your knees to 90º and explosively jump up as far as you can. Keep your arms near your chest through the entire jump, holding the weight securely. Try for three sets of five good power jumps - remember, quality over quantity.
Wall Sits

Roll Ups
For a roll up, gymnasts start with a candlestick, keeping a tight core, extended legs and rounded back. As they rock forward, they tuck stand and then jump up. This should be one continuous motion: rock into candlestick, as rocking down, jump up with power. The jump up should be explosive and build power, using all of their power through their legs and feet to push off the ground.
Squats
In a squat, the gymnast lowers their hips downward and backward while bending their knees, hips and ankles. Squats (when done correctly) build muscle and teach gymnasts how to engage the muscles needed for a good set - which is key to a great back handspring!

Back Handspring Flexibility
Back Flexibility
A bridge in gymnastics is when a gymnast lies on her back with her hands in bridge position, and pushes off her hands and feet to arch up off the floor. But not all bridges are not the same. In gymnastics, they have letter grades assigned to the characteristics of a bridge. Working bridges can improve back flexibility. Remember to be careful and only do what you’re able to do.

Shoulder Flexibility
One of the limiting factors in back handsprings (and bridges) is gymnast shoulder flexibility. To begin this drill, lie down on your stomach stretched out with your arms above your head. Grasp a dowel, foam, or stick with your hands, making sure your thumbs are under the stick. Lift the arms off the ground at the shoulders, keeping the arms straight. When lifting your arms, keep your chin on the ground and make sure your wrists are straight. Don’t lift farther than you can comfortably move.
